Tuesday 29 October 2013

Long long time! wow! But it is finally done.

Well guys in my last post on the 13th of October I showed you the beginning of the roof over my forge. Today the 29th of October (16 days!!) I finished it!!!!

Take a look!

Here is the framework added on.


Me in my rush to complete things forgot to put more planks perpendicular to the existing ones so the roof runs downwards, what you can see here is it running sideways.

Planks added perpendicularly.

Because of the pole right in the middle I had to move my setup around a bit. Here is the new layout.
 Here was the original layout.
 The roof is finally on!!!
 Welcome to my smithy. On the left hand side you can see my wood pile covered in an old sign, just behind that I've nailed in an old wooden garage door that fits that first square perfectly and is now a wall. its dark and perfect inside!

This weekend will be fun getting use to the layout of everything again, Im planning on making two lilys (The last one got lost), and a few more tools for the smithy.

Thanks for reading everyone, keep it up!

Sunday 13 October 2013

Busy weekend at the forge. And my roof is halfway up!

Well this weekend sure was a busy one. I have been planning a roof for my forge for a while and have finaly got around to doing it. Samuel and I sunk the three gumpoles needed as the main supports yesterday. Two out of the three holes I had to dig were solid rock, so that was fun to go through. As you can see here this rock is solid!

This is the rock after a dozen hits from Samuel and I

The first pole it up!

 Samuel Helping me with the cement.

 All three poles up.

 And all concreted in! Next weekend we will be putting the brandering and zink sheeting on to finish it. Then forging in rain, shine, snow and sleet!

 This bigish critter I found in my bag of anthracite, maybe that's why the price has gone up from R180 per 70 kg bag to R210...


Here are a few other things I hammered out today (Sunday and all my joints ache from the assault on those blasted dolomite boulders.)

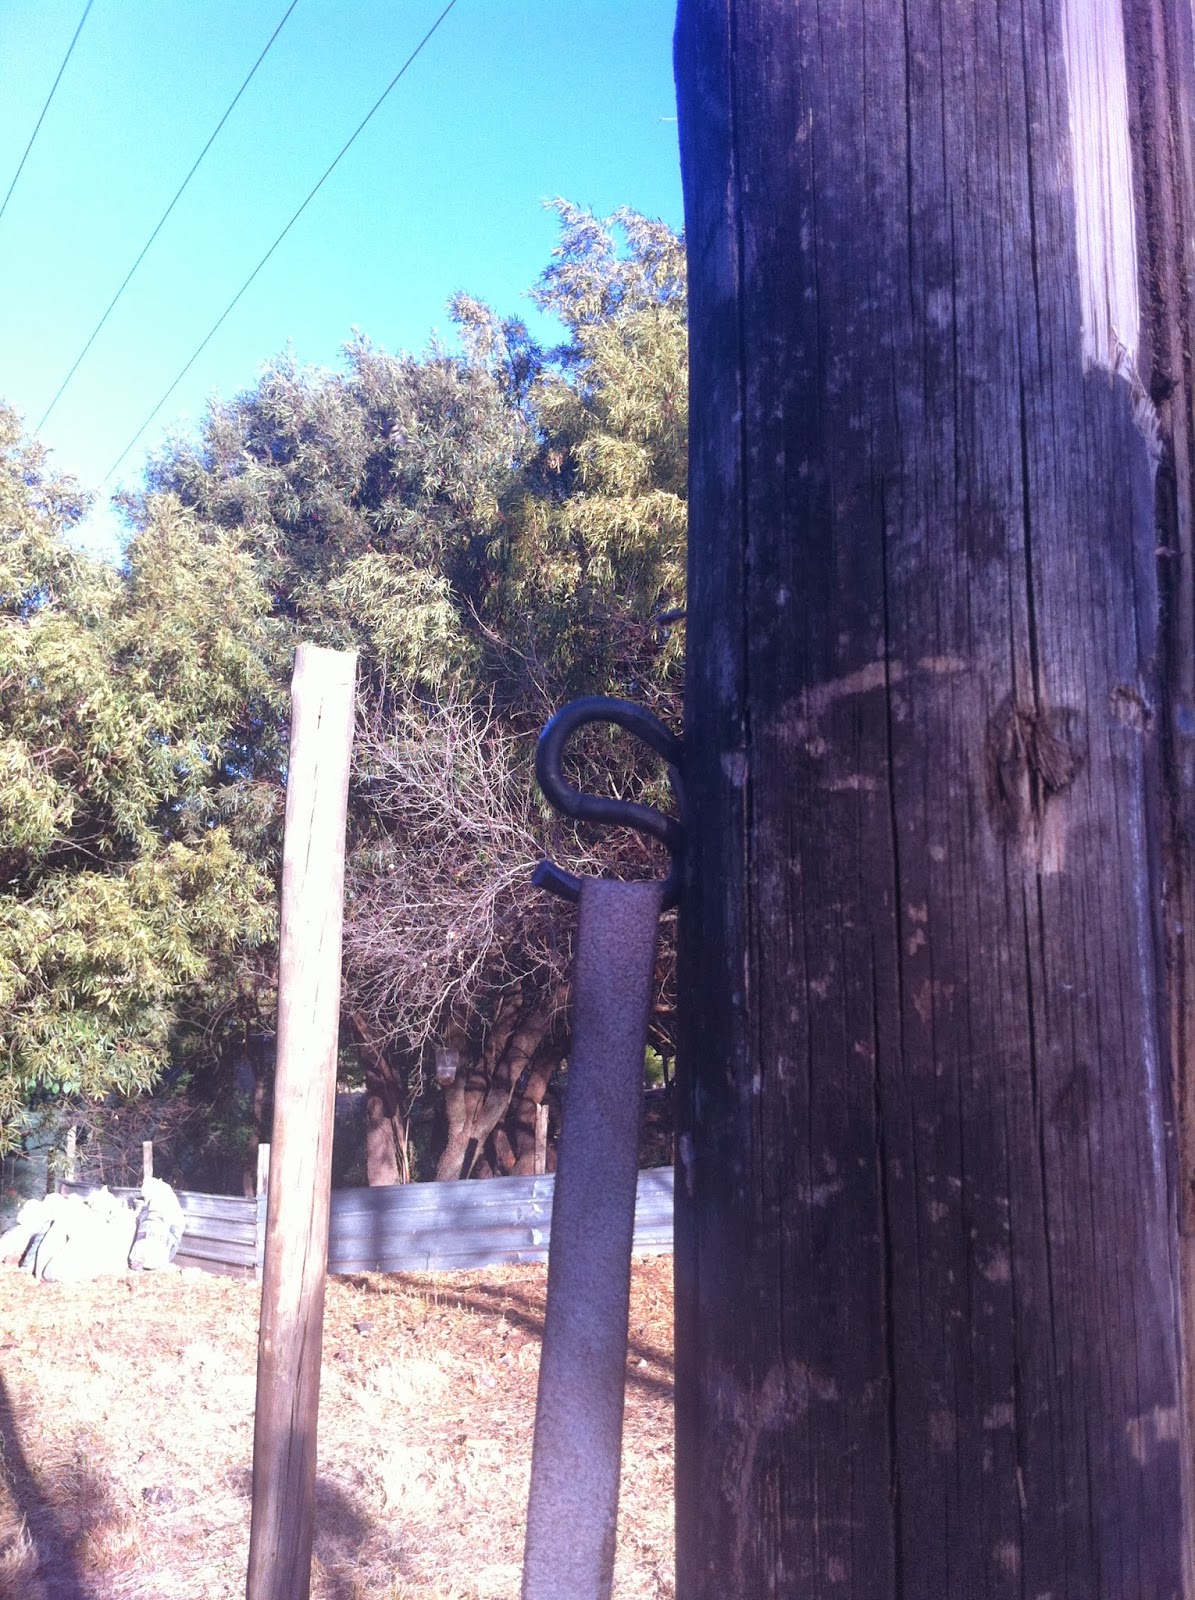
A simple S hook to hold my things on the pole. A few more of these will be made as they are really useful.

I am not sure of the name of this lovely invention but I call it an anvil ruler, it clips onto the top of the anvil and has a very snug fit, the markings on it are more permanent than chalk so it makes accuracy and measurement much easier.

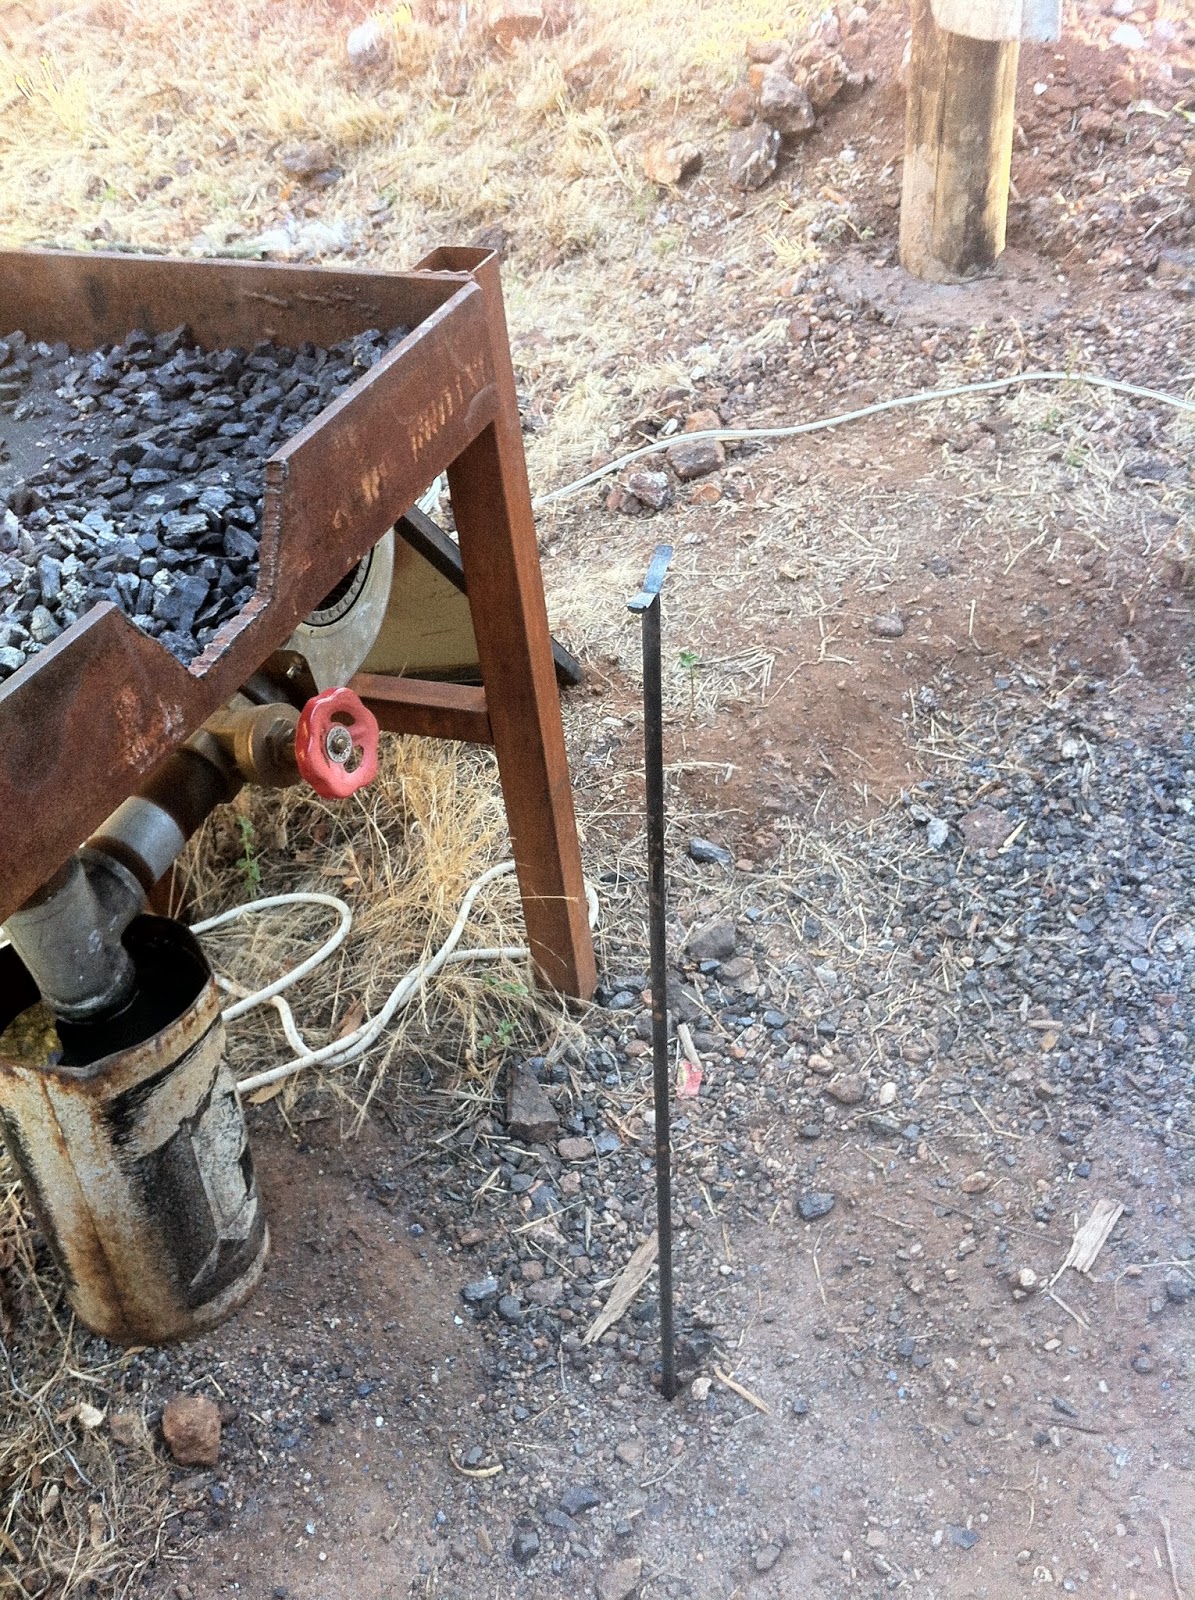
 Another unsure name is this item that I call a long stock forge extension, basically it enables me to work with very long metal stock such as swords and so on. The base is tapered to a point so its easy to drive into the ground, and the top piece is a T shape with raised edges so as to prevent the stock from slipping off. Particularly useful in making my next item.


These are nearly complete, Bolt Head tongs are their name and they come in useful for gripping certain sizes of round and square stock, maybe even some flat bar if you position it right. As you can see I still have to draw out the reigns a bit and weld extra length onto them, but that's for next weekend.

Here you can see the square jaw that makes it so nice to hold onto regular sized stock.

Keep reading guys and let me know what you all think? Thanks to all of you!

Saturday 5 October 2013

Rams Head cane topper

Well guys I got some time in this morning at the forge. Here is the fruit of my labours, my first ever Rams Head cane topper. This little beauty took me about 2 hours to make seeing as it was my first and I was being very cautious so as not to burn the horns off and make it a unicorn. Here are a few pics.


Tell me what you think for my first time.

Saturday 28 September 2013

First knife completely finished.

Well guys here is the final update on my knife build. I quenched it in linseed oil and wrapped the handle with leather. The sheath is from the same leather as the handle.


Let me know what you guys think.

Wednesday 25 September 2013

It followed me home!

Here are a few pieces I hammered out since the last post.

The spine of the blade, I was quite happy with my first knife being so straight. Now the tricky part will come this weekend when I temper and heat treat the blade.
 Here is another of my chainmaille armour pieces, this time I made a spiked 4-1 chainmaille bracer that extends from wrist to just past mid forearm as you can see.


 And for those of you wondering how on earth I put it on, here it is, a simple leather thong that holds it all together.

 Well look at my new acquisition from the weekend, It fairly jumped into my hands and for R400 bucks it was a good steal. It was a part of a whole set of stuff that the bloke had from a deceased smith (rest his soul) and was just what I was looking for to start my portable outfit. All I need to do now is find another washing machine motor for my other blower and ill be set!
 This thing weighs in at 30kg so its quite light compared to my 60kg brute I use normaly.
 Here you can see the brand on the forge bowl is millenium.
 This is where the blower will be mounted and the nice part about it is its adjustable so I can make anything fit in there.
 I had to dismantle the poor guy to get it home.
 All the little bits and pieces, thankfully the whole thing was covered in grease which kept almost everything mobile and loosenable.
 I say almost everything because this little fiend was holding the 4 toed foot at the base and the nut had rusted shut, if you can look closely you can see the bulge around the intersection between the nut and the bolt. There was thankfully just enough space to wedge a hacksaw blade in and start sawing, but woe to me the only blade I could find was from my neighbor and it was almost entirely flat. I counted 20 teeth along the whole length of it, so as you can imagine I stood there for quite a while.

Friday 20 September 2013

Hey guys, here are some pics of my first knife made from a section of an old leaf spring from my moms bakkie. It still has to be tempered and heat treated and have a handle put on but Ill do all that next weekend hopefully. Tell me what you think?


This is the orrigional piece of steel I used, it was cut from a section of leaf spring.


The rough shaping at the forge.


The final shaping and cleaning. All that needs to be done now is to temper and heat treat the blade, then Im going to leather wrap the handle.


My grandfather trying out my chainmaille coif I am working on.

Keep reading guys.

Monday 9 September 2013

Assagai finnished!


Well here is the final product, the handle is varnished and the blade is engraved with the clients name. I wrapped the join with some leather to soften the tansition a bit and all in all it was a great success. Ill be meeting the client in two weeks to give it to him as it is for his fathers birthday.


Thanks for following this one guys hope you liked it.